
Long time without me posting content here and that’s on me. I’m aiming to do more long form content this year which is hopefully interesting for folks. I haven’t however been totally slack and the last few months for me have been all about bubbles. So. Many. Bubbles.
About two months ago during my local photography clubs meeting (being done online due to well this whole pandemic thing) there was a presentation and one of the shots they showed during that was a crude but still really interesting shot of bubbles which really grabbed my attention. I hadn’t really thought of trying bubble photography before and a snobby part of my brain had previously dismissed them as clichéd which honestly is a really silly and self limiting view. So I set about giving it a go.
I won’t be going into detail about how to do bubble photography as there are many really good guides online but here is one of the many youtube videos I found extremely useful.
I’m a little ashamed to say that I didn’t really going looking for guides before I did my first attempt. I just grabbed some bubble blowing fluid from the local supermarket, poured it into a bowl and just tried to see what I could get using the macro lenses. The result was ok but not the image I had my mind of what I wanted to get.
From there I worked on trying to just photograph a single bubble. I was only using a small light source because I figured at the scale that’s all I’d need. I was wrong. I got sheen but nowhere on the scale I hoped.

This was the point I realised I really should do some more research. It became clear what I needed was a much bigger light source much closer to the bubble to get as much “sheen” as possible. The tip from the above YouTube video of using a back end lens cap was also a game changer as it provides a great shallow dish perfect for blowing decently sized bubbles.
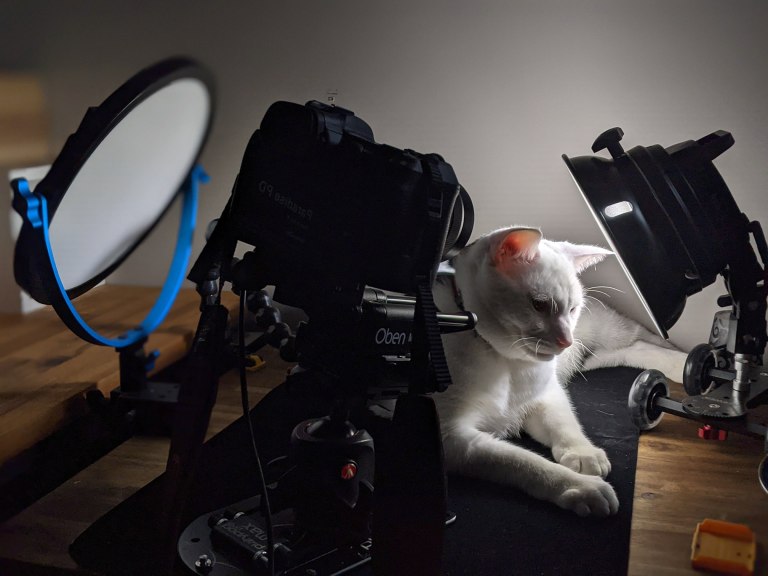
Mixing in glycerine into the bubble mix also provided bubbles that survived a decent few minutes. It was time to start over with anew set up. Occasionally the cats “helped” with this.
First off I started with using the round white LED light that produces a nice soft light perfect for what I was after. My first attempt at placing the light worked better but still wasn’t quite what I was after.
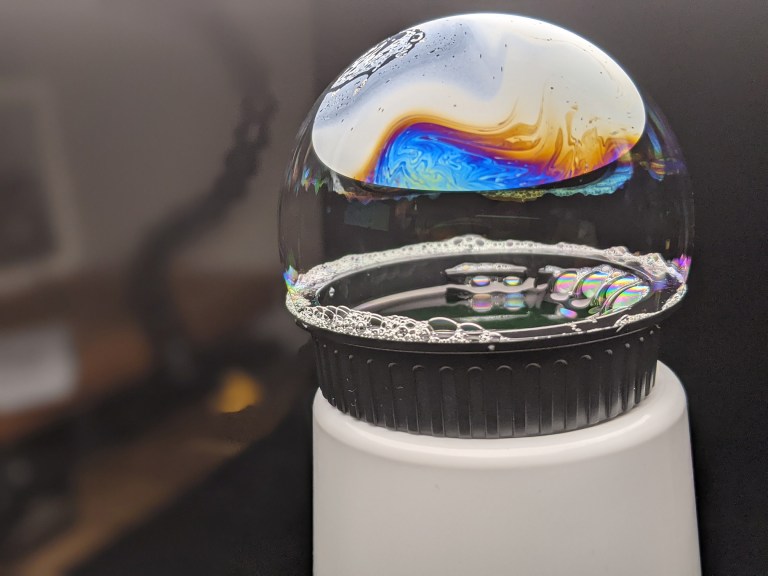
Still not the half dome look I was after but starting to get some seriously cool images out of it.
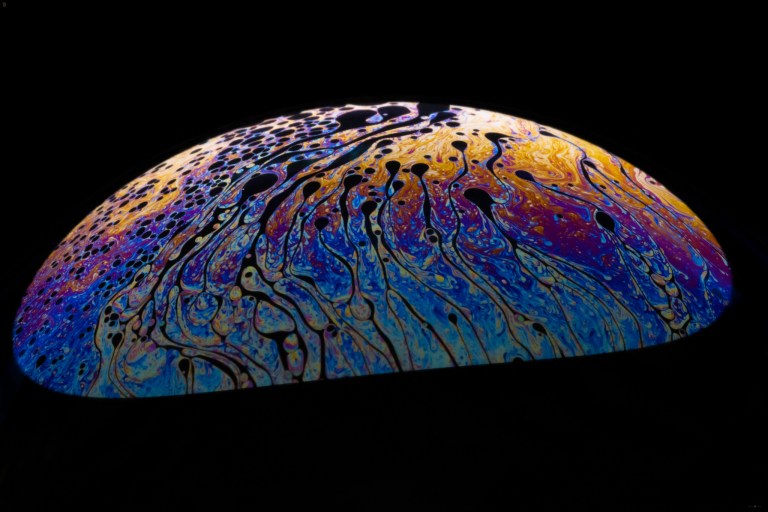
What I needed was to get a bigger light source even closer to the bubble. I have some nice softbox lights that met the size requirement but to get it close enough I needed something to hold it overhead which wasn’t easy to do in my limited space. So I went hunting for a boom arm to do the job and ended up getting a reasonably cheap one off Amazon.
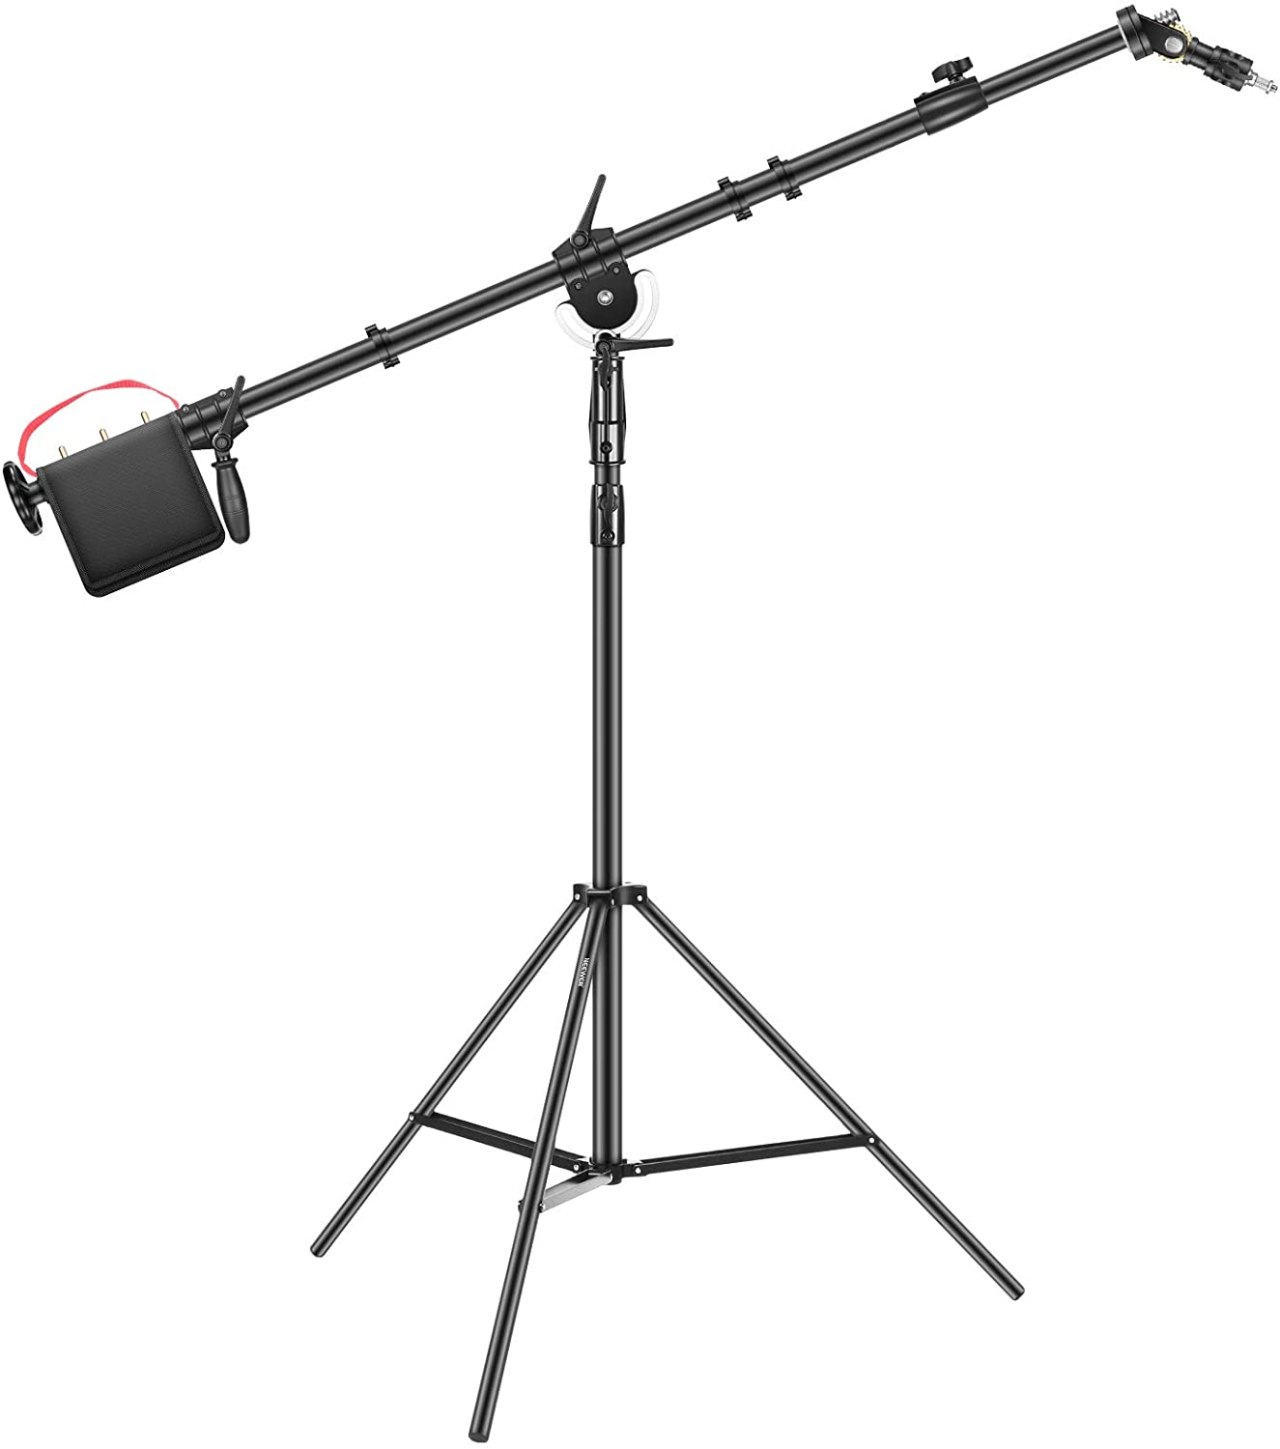
The model I picked end up being quite a bit larger than I thought it was but it worked very well. I used coins to weigh down the sandbag since they are less messy to work with and well cash isn’t exactly in vogue at the moment.

Much better and getting so much closer to the image I had in my head. I was really starting to get where I wanted.
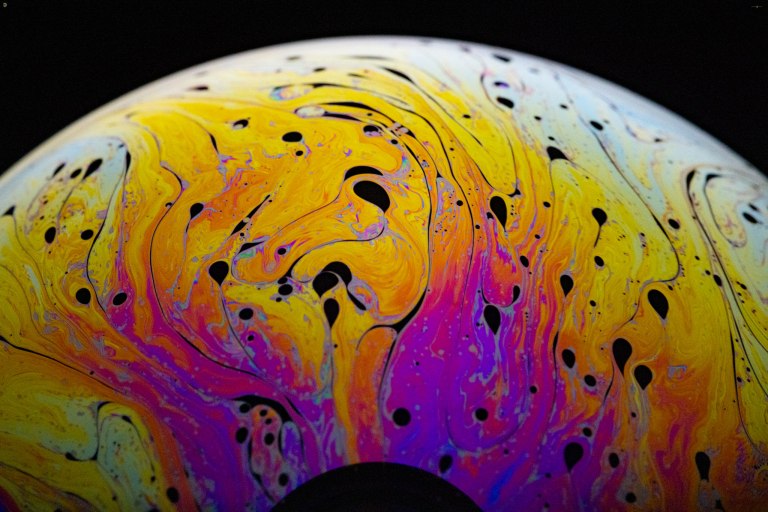
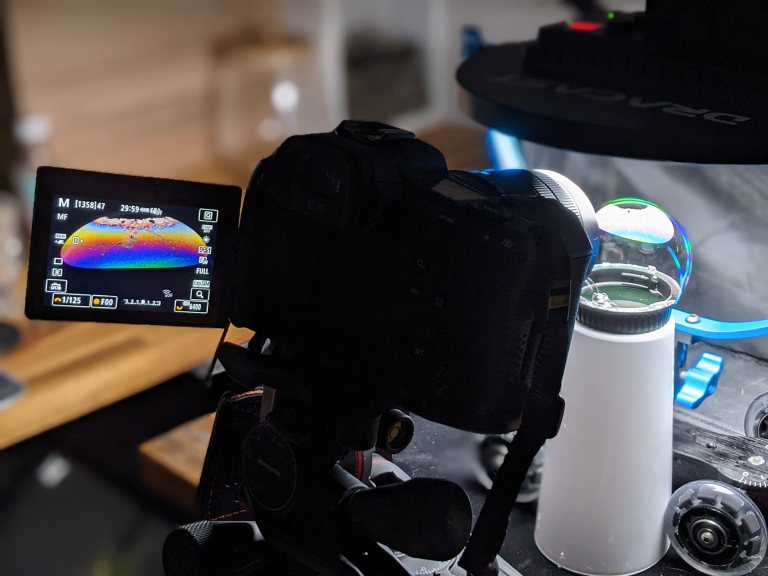
This arch effect looked pretty neat but wasn’t quite where I wanted it to be. Turned out that the black hemisphere at the bottom is actually the lens itself being reflected in the bubble and darkening out the sheen. So I switched away from the 60mm macro lens I had been using to a 100mm one to give myself some more distance. This however lead to a new problem.
See it? The wrinkles in the fabric on the softbox were casting shadows onto the bubbles. Could I get away with them? Probably. Were they annoying me no matter how I tried to edit them out? Yes. The most frustrating bit was they weren’t really visible until I had imported them onto the computer for editing. So with a little grinding of teeth I went back to use the round LED light but using the overhead boom to get much, much closer.
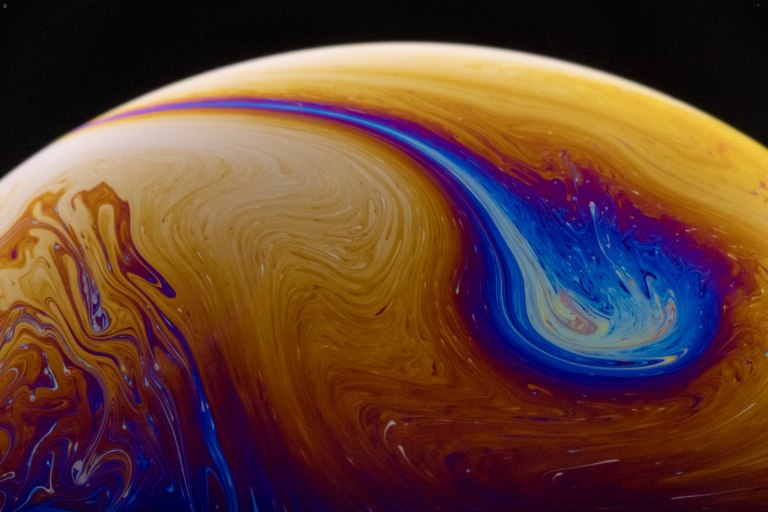
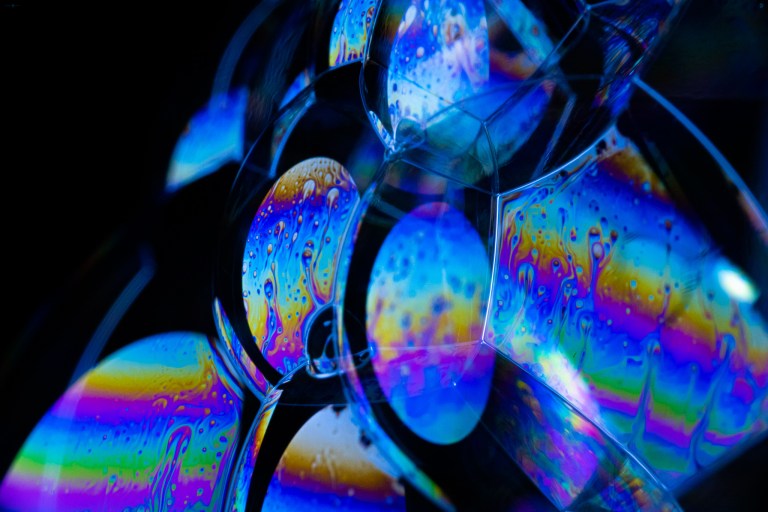
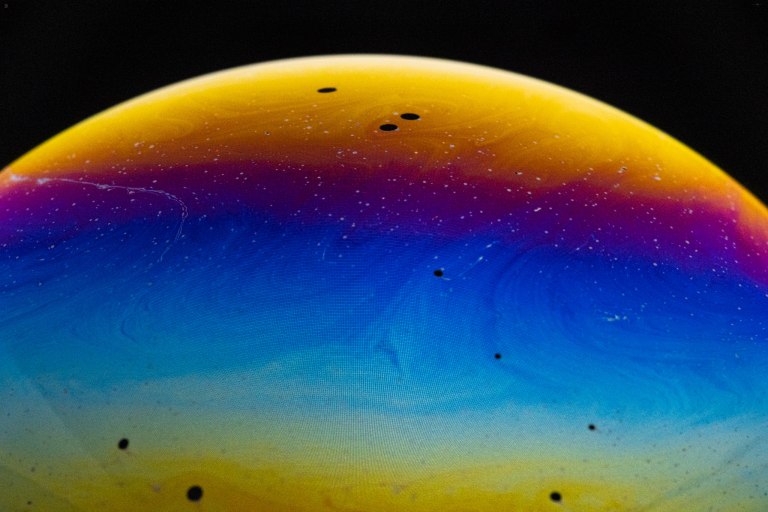
This is much, much more what I wanted. Little alien planets with their own little weird atmospheres. There’s a huge array of potential colours the come out, everything from this “coffee stain” look that I really love, to this horrifically 70s movie level of trippiness that I assure you is not over edited. It really is that obscenely bright.

After two months and over 2000 photos I’ve really started to hit the mark with what I want with bubble photography. Even better I’ve discovered a new love for doing macro videography which I will post more about in weeks to come, I’m currently learning video editing which is taking some time. For now if you are interested in more bubble photos and videos I am posting much more regularly to my instagram account.


One Reply to “Adventures In Bubbles”